In this post I’m going to show you how you can setup a custom workspace in Premiere Pro!
Hey guys! My name is Scott and I make tutorials like this one on Premiere Pro, Photoshop, and articles on tips and tricks for freelancing. So please do consider following this blog (on the top left on the page) and subscribing to my YouTube channel so you don’t miss any of those. Alright, let’s get right into how you can set up a custom premiere pro workspace.
So I first want to talk about how workspaces are designed in Premiere. All of these panels you see can be adjusted and moved to pretty much any location you want. For example, I can pull the project window which is in the lower left part of the workspace into this upper left window if I’d prefer it in that spot.
There’s also a bunch of panels we don’t see at the moment, but if we go up to window and click on that we’ll get a drop down menu with a bunch of different panel names. If I was to click on one of these names here, for example, effect controls, it would open that window up in my workspace. So there’s actually a lot of panels you could potentially have open at the same time, if you wanted to set your workspace up that way.
At the top of the program you’ll see a list of different names, which are preset workspaces. There’s assembly, editing, color, effects, audio, libraries and graphics. If you click on one of those it will reconfigure your workspace to that particular setup. So if I was working on a color grading project, I could hit the color workspace and Premiere would bring up the preset color workspace that’s better suited for color adjustments.
But the most obvious workspace you’ll probably spend the most time in would be the editing preset. So I’ll go ahead and click on that. I’ll just take you through how I set up my workspace in Premiere, and how you can save it as a custom workspace.

Project Window
I usually keep my project window towards the top left, so I can see all of my media files in a large window all at once. Hitting the arrow button to the right, you’ll see a drop down menu of the different windows within this one panel. The first one here is markers, which if you wanted to make notes on a particular section of a video clip you could mark it. For example, maybe a crew member steps into frame or a boom mic dips into the shot, you could mark that part of the clip so that it can be easily found and removed later.
Libraries
This is a place where you can add stock footage, or images, or music from Adobe’s cloud storage. This can be convenient when you have a lot of media that you use on a frequent basis that you don’t want to store on your hard drive all the time. You can access all those clips through the cloud pretty simply.
Events
The events window is in case an error happens while you’re editing, like a plug in or media goes missing suddenly. An error message will appear in this window, giving you some information about what happened so you can try and troubleshoot the issue.

Lumetri Scopes
Lumetri Scopes is mainly for color correcting your footage. If you right click on the panel, a menu will come up with different options and presets to visualize the footage color and brightness. I’m not going to go much deeper into this right now, because this is a video on workspaces but it’s something I can deep dive into in a later video.
Captions
Next we have the captions window. This is used primarily when you have subtitles that you’re editing into your footage. Using the text windows, you can change what the subtitle says, it’s font size and color, or change the timing of the text. Now, subtitles do not automatically appear in Premiere for video files. If you want to add subtitles, you’ll have to have the audio portion of the video transcribed. There’s a number of services out there that will transcribe videos, one way to do it for free is, export your video and upload it to YouTube privately. YouTube automatically creates subtitles for every video, so you’ll just need to go to YouTube Studio and then select subtitles and select download from the video you want. You get an SBV file, which will have to converted to an SRT file for it to work in Premiere Pro. There’s a number of free conversion sites online that you can use to do that, such as LINK HERE. I would say YouTube does an OK job when it comes to transcribing videos, it gets most of the words right. However, if you need it to be a perfect transcription, you’re much better off hiring a professional service to do it.
Media Browser
This panel lets you view files on your hard drive that you may want to import into Premiere. If I search for a file and find something I want to use, I can simply drag and drop that item into my program window above. Another way to import is use the shortcut, command I to bring up a file browser window and you can search for files that way.
Info & History
I’m going to briefly go over the info and history panels, as they’re pretty self explanatory. Info just gives you the file information of a clip, it’s size, aspect ratio, amongst other things. The history tab just gives you a rundown of action you’ve taken in Premiere since you last opened the project. You can clear your history by right clicking and selecting clear history, also if you don’t want to see any of these panels just select the list icon and select close panel. By the way, the undock panel will separate the panel from the window so you can move it around however you like. Then if you want to add it back into a panel, just drag and drop it into that area.

Effects
Premiere Pro has a lot of built in effects that can be found in the Effects panel. There’s a ton of different video and audio effects you could play around with, everything from color correction to audio delay. I may do a video on just the effects panel at some point, because there’s so much here to cover. But typically for my workspace I keep the effects panel in the lower left corner, and that’s where I can easily find video transitions like crossfades, dip to black, exponential fades, and other effects I use on a regular basis.
ToolBar
I usually keep the toolbar on the far right, next to my audio levels panel. I’m not going to go into much about the toolbar at the moment, because I covered this area in my how to get started editing premiere video which you can find by clicking the link above.
Effects Controls
The effects control panel is one of the most essential parts of Premiere Pro in my opinion. This where you can control the size of your video frame, the opacity, control the audio levels, and change any text that you might have on screen. I normally keep this widow in the top right corner of my workspace. This allows me to quickly glance at the settings in my effects control panel and also check the preview monitor to it’s left. Speaking of the preview monitor, the workspace setup I’m showing you is what I typically use for a one screen editing setup. When I work from my home office, I have a second monitor that is solely dedicated as a preview monitor while I edit. For the purposes of this video, I’m showing you what a single monitor setup looks like because this how I would use it if I was editing on my laptop while on the go.
The rest
For all of the other main panels in Premiere, like the timeline, the audio levels, and source monitor, I keep those in the same position as they normally are in the default setting.
And I just want to ask you guys, what’s your preferred setup? There’s a ton of different panels inside Premiere, do you have a particular panel that you never use? Let me know in the comments below! Also, if you’re enjoying this video so far please hit the like button and feel free to share this with anyone else who might also enjoy it. Ok let’s move on to how we can save our custom workspace.
Creating A Custom Workspace
Now that we have our workspace setup the way we want, we can save this layout as our preferred setup each time we open Premiere. So to do that, we go up to window, workspaces, save as new workspace. Then just give your new workspace a name, I called mine Scott’s Workspace. And that’s it, each time I opened up Premiere from ths point forward it will automatically default to my custom setup.
Preset Workspaces
At the top of the program you’ll see a list of different preset workspace names. These are workspaces that have been presetup by Adobe that are designed around specific editing tasks. I’m just going to go briefly through each of these.
Learning
In the learning tab, Adobe set up some learning materials around how to get started with Premiere. They’re short clips that introduce you to the program and the essentials you’ll need to start editing. This is a great panel to have if you’re just starting out and want an overview of Premiere, but for editors who are familiar with the program, this panel isn’t that necessary. So to hide this panel, we can right click on the list icon. Click Edit Workspaces. Then we can drag the learning tab down to do not show.
Assembly
This is a great panel for reviewing and organizing your video clips for the first time. You may have a project where there were multiple types of footage recorded. For example, it could be an interview set up with multiple guests. In the assembly panel, you go over each clip and create separate sequences for each of the different guests. Or maybe you have b-roll footage that was shot, and that can be organized into its own sequence. So then later, you can easily find and pull b-roll clips from that sequence.

Editing
The next few panels are pretty self explanatory, but I’ll go over them briefly. The editing panel is typically the default workspace that comes up when you open Premiere Pro for the first time. From here, you can start customizing any of these panels and move them to locations that best suit your workflow.
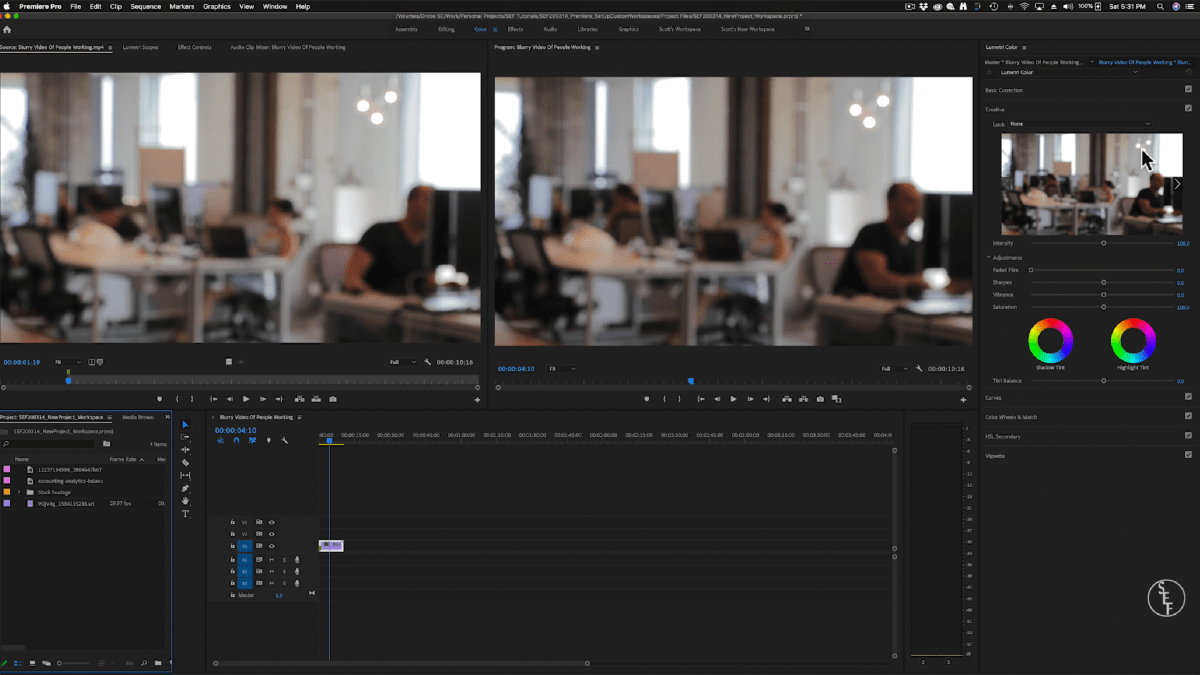
Color
The color panel is where you can adjust all kinds of different settings involving brightness, contrast, RGB Curves, saturation, and a lot more. You definitely can spend a lot of time in here playing around with the many different settings to get the right look for your clips.
Effects
The effects panel is very similar to what I showed earlier, just this preset highlights the effects panel more prominently. So we see all of the same effects that I showed you earlier, and this also has the essential graphics panel included. The essential graphics has things like lower third graphics, animated text, movie style credits, basically a lot of different graphics involving text.

Audio
This is another panel that’s pretty straight forward in it’s purpose. Here you can adjust all kinds of different settings that are audio related. Or you can spend some time and go through each of the audio effects that can be added onto your clips. I think in a future video I’ll go over how you can actually send audio clips from Premiere to Adobe’s audio editing program Audition. From there you can make adjustments, and easily send the audio clip back to Premiere. But that’s for another video!
Graphics
The graphics panel highlights what I showed you in the Effects panel, which is all of the essential graphics text. There’s also the Adobe stock window, if you click on that it will show you all of Adobe’s graphic templates that you can buy. There’s a little dollar icon next to the ones that you can purchase, otherwise the templates are free.

Metalogging
Metalogging is in a way similar to the assembly panel, in that this panel is all about organizing. This is a really important panel if you have a ton of footage that needs to be carefully labeled and have detailed descriptions so that you can later go back and find specific clips easily. If I select a clip here, it will bring up all it’s file information. So I can see what the frame rate of the clip is, how long the clip is, what it’s resolution size is. I can fill out important information about the clips description, what scene or shot the clip comes from, these are all things that help keep big media projects organized.
Production
The production panel really is a lot like the editing panel, except there’s emphasis on the source and program monitors. You can also enlarge each of these panels by hitting the backtick button on your keyboard, that’s the button underneath the escape button. This will bring the window to full screen so you can take a better look at the edit.
Multicam
Next we have multicam, this is another straightforward panel in that it’s obviously designed for projects using multiple camera setups. Basically here you can import footage, and start organizing clips from the same scene but with different camera angles. I’m not going to get too deep into creating multicam sequences in this video, because that’s getting a little off topic. However, I will most likely make a video for how to set up multicam projects in the near future!
Hiding Workspace Presets
So going back to the editing panel, let’s say you don’t really use some of these preset workspaces, you could go to the arrow button next to the panels menu and click edit workspaces. Then you can rearrange or hide any of the panels that you’re not using.
So that’s how you can create your own custom workspace in Premiere Pro, which one of these workspace setups was your favorite? Was it the color grading, effects panel, or maybe the metalogging? Let me know in the comments below!
For more information on tutorials for Premiere Pro, Photoshop, and Freelancing tips head on over to my YouTube page and please check out my twitter page too as I share my tips and thoughts on the world of editing as a freelancer. Also, check out my other posts on Premiere Pro and Freelancing, which are listed above at the top menu of this page. Alright, that’s it for me guys, see you in the next post!
