In this post I’m going to show you how you can fade audio in and out in Premiere Pro!
Hey guys, my name is Scott and I make full and mini tutorials like this one on Premiere Pro, Photoshop, and Freelancing tips. So please do consider hitting the subscribe button that’s on the top right of this page if you don’t want to miss any of those! Ok let’s get into how we can fade audio in and out in Premiere.
Since this tutorial deals mostly with audio, I thought it would be best to attach a video tutorial I did which walks through what this blog post covers. That way you can follow along with me, and get the full audio experience that I describe through out this post.
Alright so on my timeline I have a sequence set up with a video clip and some music playing underneath it. I want the audio to fade in gradually at the start and at the end of the sequence. There’s really two ways to do this in Premiere Pro, one of them is super easy and really quick to do. The other is a little more complicated, but you have more control over how the audio fades in and out.
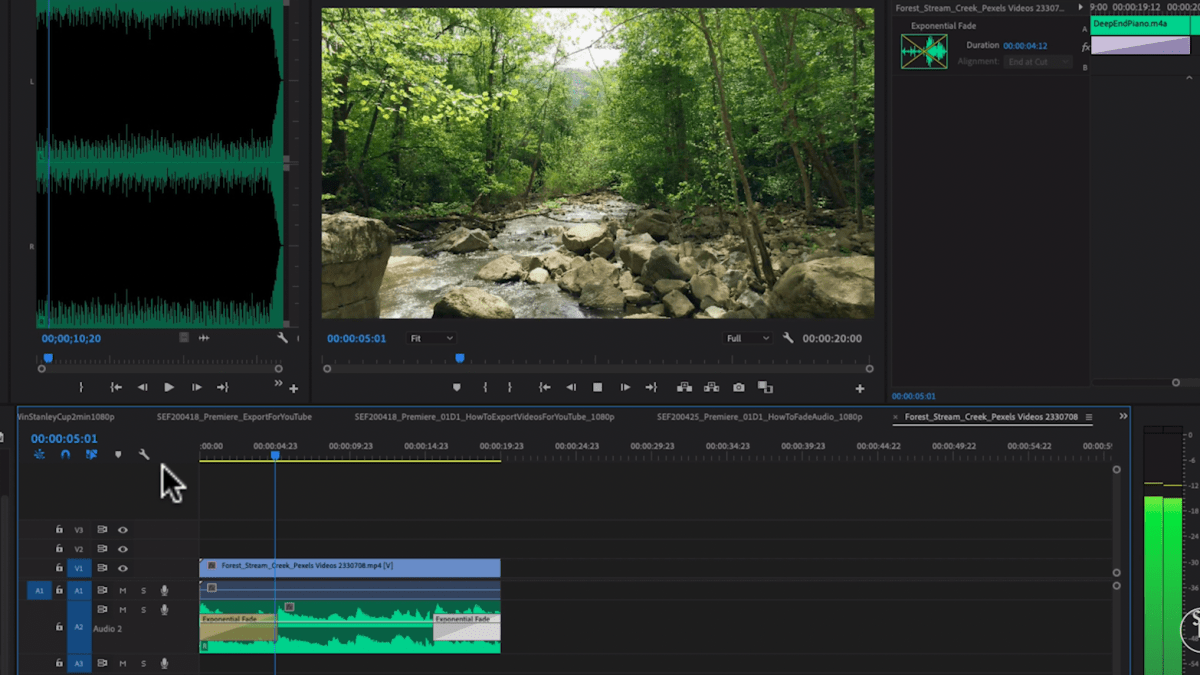
So let’s start with the easy way first. I’m going to head over to the effects panel, and type in fade. Searching towards the bottom, there’s a group of audio transitions titled cross fades. I’m going to select the one called exponential fade, and then drag and drop that to the beginning of my audio clip on my timeline. What’s cool about this effect is, it already has a built in fade up when you apply it to the start of a clip. So if I play the start of the timeline, you’ll hear it fade it in gradually.
Now that sounded pretty good, but if I want to adjust how quickly or fast it fades in, I can zoom in on my audio clip and grab the end of the fade effect. By pulling it to the left, I’m making the effect shorter in length so that it will fade in faster. Now let’s listen when I play it back:
So now it’s fading in much faster, and the same would be true if I were to do the opposite. I could pull the effect farther out, making the fade in last longer.
Next, we can do the exact same thing to the end of the audio clip, by dragging and dropping the exponential fade effect on the end of it. The same rules apply here, and now that it’s at the end of the audio clip it automatically sets itself to fade out rather than fade in. If I make the effect shorter, it decreases the amount of fade out time. And again, if I were to make the effect longer it would increase the fade out time.
Ok so that was the first, easy way of fading in and out with audio. Next, let’s look at the second way to fade audio. If I zoom back into the beginning of my audio clip, you’ll see there’s this line going through the clip. That line represents the audio’s volume level. If I pull up or down on this, it will increase or decrease the volume level.
If I go over to the left, there’s a circle icon in between two arrows that represents adding in a keyframe. So I’m going to set my playhead just a bit after the audio starts playing, and then I’m going to click on the keyframe icon to add a keyframe. Next, I’ll move my playhead to the very beginning of the clip and add another keyframe. Now, I can pull down the first keyframe to the very bottom, and you’ll see the volume level goes up from nothing to 2.4 DB. When I play it back the audio should gradually fade in. And just like the exponential fade, if I were to set the second key frame further away from the first, it would create a longer fade in.
And then I could do the exact same thing to the end of the audio clip, by just adding two keyframes and positioning them to how I want them. This is a really cool level of control, which allows you to really fine tune audio in certain parts of clips if you need to, for example if someone sneezes or coughs, you can manually set keyframes at those points so the audio dips just in those parts.
So that’s how you can fade audio in and out in premiere pro, what kind of other audio issues do you guys have in Premiere? Let me know in the comments below, and I’ll see if I can make a post for that! If you’ve enjoyed this article, don’t forget to like and share it with anyone else who might also enjoy it. For more information on Premiere Pro, Photoshop and Freelancing tips head on over to my YouTube channel. Also, check out my other tutorial videos which I’ve posted at the tops of this page. Alright, that’s it for me guys see you in the next post!
