In this post I’m going to show you 10 keyboard shortcuts you can use if you’re just starting out in Premiere Pro.
Adobe Premiere Pro Tutorial – 10 Best Shortcuts For Beginners [Video]
On this blog I post tutorials like this one on Premiere Pro and Photoshop, as well as tips and tricks for Freelancing. So please consider following my blog, and subscribing to my YouTube channel if you don’t want to miss any of those! Alright, let’s get right into the 10 best shortcuts:

#1. The Razor Tool (C , Also Shift-C for Multi layer cutting)
This is a tool that I use a lot, and if you want to get precise on cutting at a specific point in your timeline you can press the letter C (as in cat) on your keyboard to be able cut a clip. And if you also hold down the shift key, you can cut multiple clips on different layers at the same time. But there’s an even easier way to cut clips, which I’m going to show you towards the end of the post, so stay tuned for that.

#2. The Selection Tool – V
If you need to select clips on your timeline and move them around easily, you can hit the letter V (V as in Victor) on your keyboard to bring up the selection tool. I use this pretty much every time I’m editing, and it makes shifting clips through my timeline super easy.

#3. In and Out – I, O
No, not talking about the restaurant In and Out, I’m talking about marking your clips with In and Out points. This is a great way to grab a specific part of a clip that you want. For example, maybe you just need the first 5 seconds of a clip, you can set in and out points by using the letter I and O buttons on your keyboard. Then simply drag and drop the clip onto your timeline, and it will only bring the section that you marked with the in and out points onto the timeline.

#4. Snapping Clips – S
One of my favorite features of Premiere is the snapping tool. To turn this on, you just need hit the letter S on your keyboard. Then when you add a new clip next to another one it will snap into place. This saves a ton of time not having to nudge a clip exactly into place and trying to make sure there’s no gaps in between the clips.

#5. & #6. New bin – Command B / New Sequence Command N
These next two shortcuts are super simple, if you just need to create a new bin in your project window, hit command B and a new bin will appear. You can also create a new sequence by hitting command N, and a text box should appear for you to start a new sequence.

#7. Clip Shuttle Controls – Up Down Keys
If you need to quickly move from one clip to the next on your timeline, by using the up and down arrow keys you can jump from each endpoint of a clip to the next. Rather than trying to scroll down your timeline with your playhead, this shortcut saves a lot of time.

#8. Playback Shuttling Controls – J, K, L
These are the most fundamental commands you can do in Premiere, the letter J will reverse the playback on your timeline, K will pause the playback, and L will play your timeline forward. Also, each time you hit either J or L, it will playback your video at a faster speed. For example if you were creating a slideshow, and wanted to test out different speeds of a clip zooming in. This makes it much easier to see a clip play at different speeds.

#9. Full Panel Preview – Backtick
The backtick button will expand a panel to full screen, so if you were to select the preview window it would playback the video full screen. This would give you a better idea of what the final video will look like. You can also select other panels, such as your timeline, and expand that to fullscreen too if you want to have a larger look at something.

#10. Playhead Add Edit – Command K
Earlier I showed you how the razor tool can cut clips, and by holding down the shift key you can cut multiple clips at once. Well you can do that same thing but a bit faster with hitting command K. You just need to move your playhead to the point you want to make your cut, and by hitting command K it will cut all of the clips on each layer at the same time.

BONUS TIP:
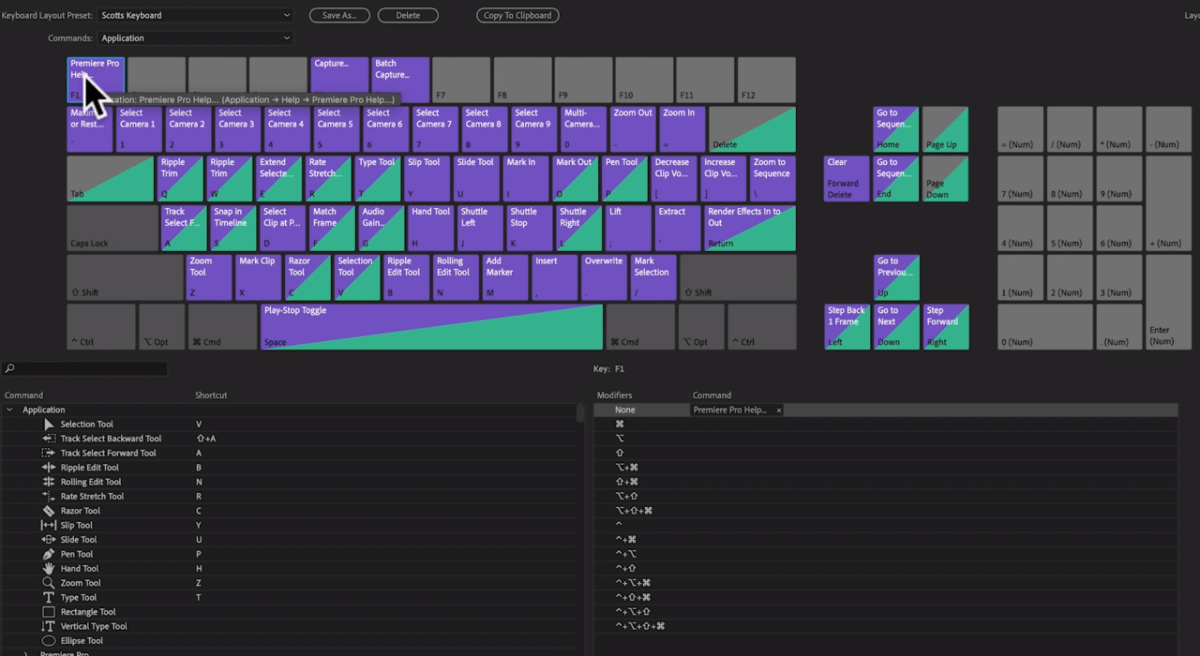
One more bonus tip, if you ever need a refresher on what the shortcuts are for Premiere. You can go up to where it says Premiere Pro in the top left corner, click on that, scroll down to keyboard shortcuts. And then a window should pop with a digital keyboard that has all of the shortcuts you’ll need to get started editing. In a future video I’ll go further into more shortcuts, as well as how to create your own custom shortcuts for repeated tasks inside Premiere.
Now, you have all of the essential and best Premiere Pro shortcuts you’ll need to speed up your workflow while editing.
