In this post I’m going to show you how you can export videos for YouTube in Premiere Pro!
Hey guys, my name is Scott and I make full and mini tutorials like this one on Premiere Pro, Photoshop, and Freelancing tips. So please do consider hitting the follow button (at the top right of this page) so you don’t miss any of those! Ok let’s get into how we can export videos for YouTube in Premiere.
So I have my project here that I’ve finished and I’m ready to export the final video. There’s two ways to bring up the export settings window in Premiere, you can first go up to File, go down to Export, and then select Media. Or you can use the keyboard shortcut, Command-M to bring up the dialog box.
The first thing you want to do is look for the format settings (which should be right at the top). The format is the codec that you want to use for your video, and a codec is the type of file that you want to create. In this case it’s preset to h.264, which is the standard mp4 format. But if I select the drop down menu here, there’s a bunch of options for me to choose from. If I wanted to export this as a quicktime file I could select that, or I could even export this as an audio only file using the mp3 or wav codecs. But for YouTube exports we’re going to stick with h.264.
The next thing we’ll look at is the preset settings, if I click on the drop down menu I get another list of different settings I can choose from. If I go all the way down to the bottom of this list, there’s several YouTube preset settings. So there’s YouTube 1080p Full HD (which is high def), YouTube 2160p 4K Ultra HD (that’s the 4k preset), YouTube 480p SD Wide (that’s the standard def setting), YouTube 480p SD, the difference between wide and non wide is that the Non-wide setting will set your video size to more of a square resolution at 640×480 instead of the wider SD aspect ratio of 854×480. You can see the difference between those in the preview box on the left. The Non Wide SD will create a letterbox effect around the video. The last setting is YouTube 720 HD, so this is a smaller size high definition setting than the 1080 preset but it’s still high definition.
The setting that I would recommend for most people, is the YouTube 1080p Full HD. That’s because it’s pretty much the standard high definition setting for most videos nowadays. If you’re making a 4k video, and you want to upload to YouTube in 4k, then of course you would select the 4k preset.
One thing to pay attention to is the file size which is at the bottom of the dialog box. When you select a preset, it will give you an estimated outcome of the file size. The larger the file, the longer it will take to upload to YouTube. However, the smaller the file, generally speaking the lower video quality it is. YouTube does have a maximum files size of 128 gb, and 11 hours of runtime. But I’m pretty sure most of you out there will come nowhere near that limit.
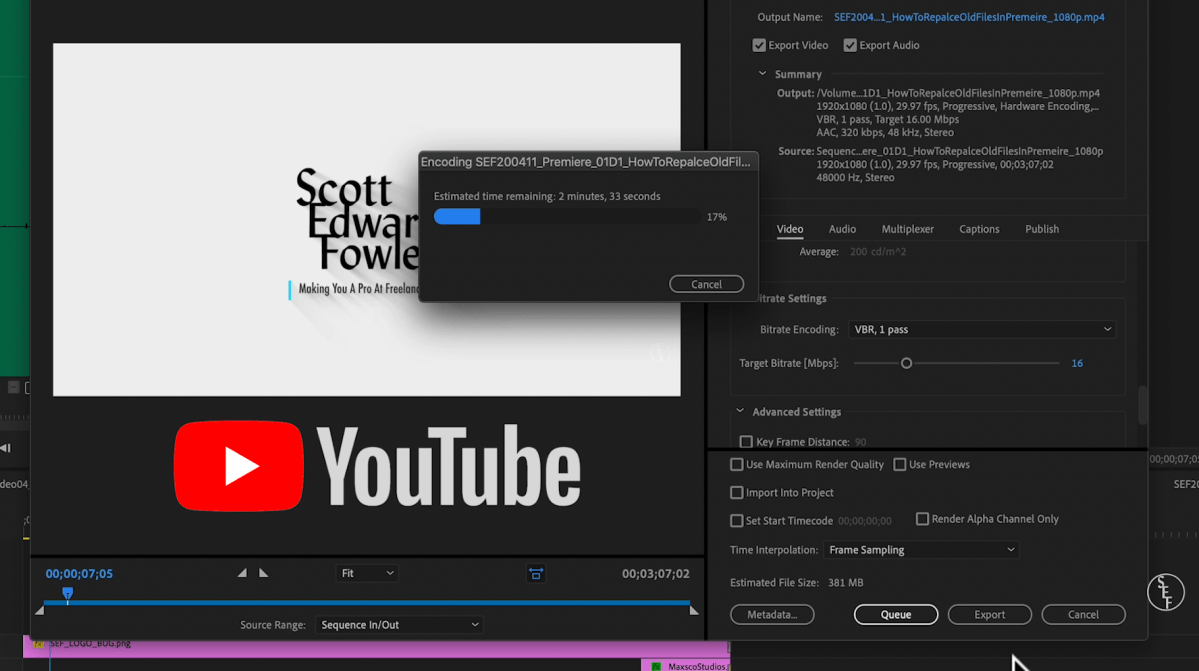
That’s really the bulk of what you’ll need to do, there are other settings you can adjust like the bitrate which controls how Premiere compresses the file when it exports. Normally, I just keep this at VBR 1 pass. And then audio is pretty much the same deal, the preset already does a good job of selecting the best settings. So audio at 48khz, and 320 bitrate is perfectly fine.
Now you don’t have to use the YouTube preset, you can just use the match source high bitrate, or try out any one of these other settings. But I like the YouTube preset because it’s the one that Premiere has designed specifically to match YouTube’s upload and compression settings.
The last thing you need to do is double check where your file is being exported to on your hard drive, make sure it’s in a place that you can find easily. Because I sometimes forget to do that, and it goes into a random folder somewhere. You can do that by going up to output name and double clicking on the file.
Next, there’s two options at the bottom, you can select either Queue (which will send the file to Media Encoder where you can export from there). I don’t recommend that unless you’re trying to batch export multiple files at the same time. Or you can select Export, which is best if you’re just exporting one video file. So I’ll hit export and the file should start it’s process of exporting.
And that’s it! So that’s how you can export videos for YouTube premiere pro, what kind of YouTube videos are you guys making? Let me know in the comments below! For more videos on Premiere Pro, Photoshop and Freelancing tips head on over to my YouTube channel. Also, check out my other tutorial videos which I’ve posted on the right side of the screen here. Alright, that’s it for me guys see you in the next video!
